Sit down, relax, grab a cup of Joe...

This is my place on the web where I'm going to be discussing what all is going on in my garden spaces. I am a container gardener for the most part and I am constantly having problems with pests, growing problems, pots, etc. I'm hoping to get feedback and advice from friends, family, and general passers by, and maybe pass on a little info here and there about plants in general!

Friday, September 28, 2012

Texas Wildflowers...a Rainy Day Post.

Greetings everyone!

Today is a rainy day outside, so my original plan to discuss my patch of Canna Lilies is going to have to wait.  I was planning on doing a replanting and to discuss the different varieties of the Canna, as well as the ease of growing of this plant.  Oh well!

Instead I have another cool idea...

Wildflowers of the Texas Coastal Bend  Part I


What do you think of when you think of Texas?  Long horned Steers?  Beer?  Cowboys?  Football?  How about Oil, or JR Ewing?

Yes.  You probably think of all of those things and probably a few more that I missed.  One thing you never think of when you think of Texas though is Flowers.  That's unfortunate because that's one of the best things about Texas--the flora and fauna of the Desert terrain.

The state of Texas spends millions of dollars every year on beautifying it's streets and highways by planting seeds and landscaping it's highways and overpasses and still the average person never really pays much attention to the landscape artistry around them.  Think about it.  When you drive down the street, do you often notice the the things right outside your window, or are you all involved in your cell phone, or perhaps your car stereo?  Perhaps you notice all of the trash that litters the highway, but how many of you really notice what exists AROUND all that garbage?  

Texas has so much unseen beauty on it's roadways, and that's why I wanted to do today's photo montage of some of the most beautiful flowers to be found in the Texas landscape.  Before I even start though, I want to assure you that there are a LOT of wild flowers missing from this.  I can't possibly stop everywhere and take photos of the beauty I see there.  If I even tried to do that I'd never make it home.  This is but a sampling...and a good way to kill a rainy day.

Enjoy!

Taken off of Laguna Shore Dr in Corpus Christi.  There are several huge stands of these Cactus down by the Flour Bluff School turn off.  During the spring, the cactus flowers are amazing!
Another shot from the same stand of Cacti.
Contrary to belief, Cactus are not a common sight in the Texas Coastal Bend.  There ARE cactus all over the place down here, but most of them have been planted on purpose and are part of landscaping projects.

Indian Blanket
You find this flower literally EVERYWHERE in Texas it seems, and it seems to be available during Spring and the first half of summer.  It's called "Indian Blanket" and I think it's one of the most beautiful of wildflowers.  I'm not sure if this is one that the State plants, as it seems to grow in ditches and in empty fields away from the roads, but it does appear on roadsides too.  With it's daisy like petals and rich colors, it reminds me a lot of Gazania's.  The plant it grows on can get rather large and you can find stands of these with LOTS of flowers blooming at one time. 

Winecup--aka Poppy Mallow
One of my personal favorites from here in the Coastal Bend is the Winecup.  You'll find these everywhere during February and March, and less often they bloom through July.  I've noticed that there aren't as many of them around when rain is scarce in the summer months, but when it rains consistently they are here through July. Some would consider this an invasive weed, and I've seen entire front yards made up of this wildflower.  Personally, I wouldn't complain until August, I don't think.

Showy Primrose--also know as Mexican Primrose
My absolute favorite Texas Wildflower is the one above--the Showy or Mexican Primrose.  This photo is kind of washed out and doesn't really reflect the true pink color of this magnificent flower.  The edges are much darker pink, and the centers are white with a splash of yellow, coupled with the Yellow stamin.  These are just so beautiful and you can find them in stands with 25-50 flowers blooming at once.  Once you've seen a stand of these, you'll never be the same.  It's an experience.

Well, that's it for today.  I have many other photos of wildflowers from around the Coastal Bend area of Texas and I look forward to sharing them with you.  We're just going to have to wait for yet another rainy day to see them.  Until then...

Happy Gardening!


Wednesday, September 26, 2012

African Violets part II--Transplanting

After Propagation--African Violets Part II

The main  leaf cutting has rotted off, so it's probably a good time to pot this one up.


Greetings gardeners and flower enthusiasts!

Yesterday I posted a talk on propagation of African Violets, and now realize that I really didn't finish with the subject.  In fact, I think I left out the most exciting part--making it look like a new plant for your collection!

It's been a long three month journey trying to get these little plants started, and there have probably been up's and downs along the way.  Maybe a leaf has rotted before a new plant has shown up and you've had to start over from scratch, or you've had an animal knock over your pot and just ruin the whole project.  Whatever the case, it's always exciting when you make the decision that it's now time to put them into pots and make them real, honest to goodness houseplants.   Before you start, you should gather up a few things and have them all handy while you work.

Example of good potting medium and a few small pots, which will be best in this instance.  Spoon and  Misting bottle not shown.  Neither is the gravel for the bottom of the pot.
Supplies you will need:

  1. A pot of suitable size, nothing too big, smaller is better.
  2. A small spoon of some kind.  A kitchen teaspoon will work (not a measuring spoon, but a regular small spoon.
  3. African Violet Potting soil or some other rich humus that is well draining.  African Violet soil mix is the best medium to use though IMHO.
  4. Spray bottle with Misting capability.
  5. About a quarter to half inch of rock or gravel for the bottom of the pot.
Depending on what you are planning on doing with your plants, it's always important to determine a good pot size for your project.  For me, when planting cuttings like this, I'm basically looking to do two things.  I want to get them growing as fast as I can, and I want them to flower as soon as I can.  In order to accomplish this, I want to use a smaller pot.  Smaller pots encourage flowering in younger plants because of the lack of space.  The plant doesn't realize that your not going to let it die, so when the pot becomes full, it thinks it better reproduce as soon as it can, and it triggers a mechanism in the plant telling it to flower.   So, for me, a small pot is the best way for me to go if I want to resell my plant fairly soon after rooting.

The first thing you want to do is to throw a few small rocks in the bottom of the pot.  You don't want to overwhelm the pot by filling it with rocks because roots won't do so well trying to grow in that particular medium, but a small bit of gravel or something to fill the base of the pot is good to assist with drainage.  This is especially important if you decide to use a pot that has no drainage holes.  The rocks at the bottom of the pot will provide a place for excess water to go if you accidentally overwater, and overwatering can be a real problem with African violets.  Too much water can cause root rot, in addition to a whole host of other nasty problems.  I really prefer and strongly recommend a well drained pot when it comes to this particular plant.

After adding the gravel deep enough to cover the drainage holes a bit, you'll want to add your potting soil.  Since I"m using a small pot, I use a teaspoon to add my soil.  I add two or three teaspoons and then spray the soil down with water so that I know that my soil is wet through and through.  Once I'm about half to three quarters of the way full, I set that aside and grab my violet sprouts.

Not a good photo...sorry.
Once again, it's time to pull out your trusty teaspoon, and dig as deeply as you need into the pot, trying to scoop out the plant and getting all of the roots.
Plant with all roots lifted out of the vermiculite.

There will still be a lot of vermiculite on the roots, but you shouldn't worry about that too much.  I try to shake some of it out without really messing up the plant, because I want to make sure that some of the roots are exposed to the new potting soil that I've chosen for it.  The sooner it becomes used to the new soil, the sooner it will start to grow and get used to it.  


Bring your new pot back over to where you are working and sit your new plantlet into the pot.  You're doing this to determine just how much more soil you are going to need.  You don't want to plant your new plant in a pot that's half empty!  Once you sit it back on top you can determine just how much more potting soil you will need to bring your plant up to the point in the pot where it will look attractive, yet still have enough room for watering without overflow.

After I saw this, I shook off some more of the vermiculite.  There was still too much around the roots for my taste.
Once the plant is sitting where you want it, fill in around the sides using your spoon and the African Violet soil, making it look like it's planted in only the soil.  Make sure that your soil isn't packed too tight, but firmly around the plant.  Packed soil doesn't drain as well as loose soil.

Pack the soil in, and clean up as needed.  I still have to clean this one up a bit.
And you're done!  Water your new plant once a week roughly, depending on how dry the soil gets.  If it's completely dry, water it thoroughly.  Make sure the water drains out though and that your not leaving your plant in a bowl of water (again...the root rot thing).

As I discussed yesterday, you'll want to find your new plant a home in fairly indirect light, I have luck in a North facing window, but you can try different windows in your home until you find one that works.  Just don't forget about it.  If your plant starts yellowing and losing leaves it's trying to tell you that something is wrong, and many times it's trying to tell you that it doesn't like where it is.  Try different light, and eventually it should find a place it likes.  Once you find the spot, it will be happiest if left there permanently.

Now, I am going to plug a fertilizer that works well for me.  Schultz African Violet food is gooood stuff for my violets.  If you are using Miracle grow soil with premixed fertilizer, don't use the Schultz food, but rather let it run it's course for about six months and then start using the Schultz food.  I use seven drops per quart of water, and I water the plants once per week.  They love it and grow like crazy!

Thanks for reading, and I hope to chat with everyone again soon!  Comments are most welcome!  Share your thoughts and advice with me.  If you find I've done something Terrible, please let me know.  As I say, different things work for different people.  What I have written here is what has worked for me, but it's not written in stone!

Happy Gardening!

PS...found another link to African Violet clubs and societies!
http://www.grownotes.com/african-violet-clubs/

Enjoy!


Tuesday, September 25, 2012

Propagating African Violets for Fun and Profit!


Creating baby African Violets--Easy and Fun!

This is the parent plant that I've decided to use.  Notice that it's a nice huge plant and very healthy.

Without question, the African Violet is the worlds most popular houseplant.  As a child, I remember going over to the homes of many of my relatives in St. Louis, and while there I would always admire the rows upon rows of African Violets lining the insides of windowsills, or sitting in little rolley carts in sunny areas of the house.  Back then, in the 1970's, there were a few different colors but mostly they plants were light purples to deep purple, but you'd occasionally see a nice pink one.

Today the colors and varieties of African violets have exploded and hybrid's abound.  One can find African violets ranging from pink through deep purple colors including magenta's and even whites, but you can add nearly ANY variety or mix of colors, as well as ruffles, and anything else you can imagine to make the African Violet an always interesting houseplant to keep at your home.  It seems every time you turn around there is some kind of new hybrid of this plant, and keeping up is nearly impossible. 

Beautiful Magenta Blooms--a real treat for the eyes!
 Just like any other flower, African Violets have obsessed enthusiasts.  There are clubs and organizations specifically dedicated to this most popular of houseplants, and information abounds on the web and in books regarding their flowering, growth and propagation.   If you love African Violets as I do, check out the following: The African Violet Society of America http://www.avsa.org/ (Includes links to clubs and societies dedicated to violets all over the USA.) 

Lately, I've been admiring  the African Violets at my Mother's house.  She has one that is a strong deep magenta color, and it's simply HUGE!!  I've talked her into allowing me to take cuttings from it and so I figured that I would share the "root from leaf cutting" process with the people who read my Backyard Garden blog.

First off, you're going to need some supplies:


  1. Scissors
  2. Vermiculite (preferred) or other course seeding potting medium
  3. Rooting Hormone
  4. Pot with good drainage or stones in bottom if no holes for drainage
  5. Spray bottle with misting sprayer

Add a pair of sharp scissors to this and you'll have it all!
The first thing you need to do is to take the cutting using the scissors or shears you've selected for the project.  This can be more difficult than you might think.  African Violets grow in clumps with leaves sprouting random around the plant.   Personally, I have had more success with the large leaves from the middle edges of the plant more than the older leaves at the base.  You'll want to pick one of those and cut it off the plant, transferring it into water IMMEDIATELY.  Even if all you have is a soaking wet paper towel at the moment, it will suffice.  You need to keep that cut open and water filled if you can.  If for some reason you cannot get the cutting into something wet right away, all is not lost!  Get as much of the leaf stem as possible and when you get the cutting home or to wherever you plan to work, recut the stem just above the place where you originally cut.  When you get somewhere with the cutting that you can transfer it into a cup of water, then it's time to start getting the soil set up.  

Choose a window that gets indirect sun.  African Violets can handle SOME full sun, but they aren't fond of it.  They like indirect light.  Additionally, they don't like to be moved a lot so you'll want to pick your spot keeping in mind that you'll be keeping your plant there for it's lifetime, or at least close to that spot for it's lifetime.  I'm not saying that this is required, but you'll have more success with propagation if you do.  Once you've done that, grab your container, and fill it with Vermiculite or the potting/rooting media of your choice.  I find that the Vermiculite works very very well, so that's what I'll use from now on.
This is Vermiculite.  You can purchase it at any garden center or department store.  It's very affordable and a great rooting medium for many different kinds of cuttings and plants.
One you have filled the pot that you are going to use with the vermiculite, you'll need to wet it down.  I find for this first wetting it's alright to use just a saucer full of water for the bottom of your pot to allow the water to soak up into your medium, and then use the sprayer/misting spray bottle to spray the heck out of the top soil.  Make sure that the vermiculite is fully wet though before you place your leaf cutting into it.

Next you need to pull out your rooting hormone.  There are many kinds of rooting hormone and they sell from $5 to $15 a bottle roughly.  Personally I've been using an inexpensive brand I purchased at a large, well known department store.  It's a dried powder variety, but I understand that it works just as well as the liquid varieties of rooting hormone.  Whatever you use is up to you...your preference.  You want to dip the cut stem of the leaf in the rooting hormone up to about a quarter of the way to the leaf.  In other words, you want to still be able to see 3/4 of the leaf stem and the leaf left after you've dipped in hormone.

Schultz rooting hormone is both inexpensive and easy to use in the powdered form.  Just dip the leaf stem in as deep as you want it, and place the stem into the vermiculite.
Now comes the difficult part.  There are a couple of different ways that this can be done, and people who do this on a regular basis tend to disagree on how to do it...The placement of the leaf in the potting medium.  Many people say that you should just "lay" the leaf cutting onto the vermiculite medium.  This may work, but it's never really worked for me.  My experience dictates that you make a small hole in your potting mixture (enough to cover the rooting hormone and to support the leaf) and place the leaf standing in it.  I usually have it lean a bit against the side of the pot that I'm using so that there is some support to keep the plant in place once I cover it up.  The next step is going to take a while, and that support will become necessary.
Notice how I have the leaf leaning against the corner of the pot.  While not elegant it IS effective for giving the leaf support while it's rooting.
Now we wait for the plant to root and produce new leaves.  This is just nerve wracking, and to be honest on many occasions I have darned near given up on the process altogether during this waiting phase.  You'll want to mist the vermiculite as often as possible, usually once per day, and keep the medium as moist as you can.  I've been told that you can't over-mist the soil, but you want to be careful to not get too much water on the leaves.  Too much water on the leaves can cause them to rot.  If you accidentally soak your leaf with water, take and dab it with the corner of a paper towel until it's at least mostly dry.  That will help prevent the rot from happening.

 It takes about two to three months, but small leaves will start to come up around the base of the big leaf that you've inserted in your potting medium.  When that happens, Viola!  You have a new African Violet plant!  Congrats!  Please note this though...you aren't just looking for roots on your cutting...you need new sets of leaves coming up around the base before you transplant.  A rooted leaf is not a new plant in this case.  If you don't maintain patience--if you transplant too soon--you could wind up with a nice one leaf plant for eternity.  Be patient and wait for the new little plant to come up around the base of the cutting, just like in the photo above.  Notice the little baby plant around the base of the leaf?  That's what you're waiting to see.

If for some reason you come up on six months and still have no baby plant, you may want to give up.  There are certain strains and hybrids of African Violet that can only be reproduced by special means.  If you've got a particularly fancy variety and cannot get the new plants to come up around the leaf, this might be the case.  Make sure you give it a full six months though before you give up completely.  Heck...I don't know that I'd give up even then.  I'd probably just go ahead and put the rooted leaf in a potting mixture and see what happens.  It's hard for me to give up on a plant altogether.  

Tomorrow I'm going to post how to pot one of these up when you've got it to the size where you think it's ready to be moved.  Until then...Happy Gardening!

Monday, September 24, 2012

Well, this morning I had to report for Jury Duty.  That went very well, and I wound up being cut loose early. Happy Mykey!

Imagine my disappointment when I got home and took a look in my garden and found that my latest Datura bloom was a malformed flower!

Part of the first petal are missing.

This is what it SHOULD look like, but the other side has no surrounding petal!


While it IS still pretty and has a wonderful fragrance, it has a strange problem in that the outer petal does not continue around the entire flower.  This is supposed to be a double petaled flower hybrid, and before it was eaten to death by that "Horned Caterpillar" it DID have it.  I'm wondering if it could have something to do with not receiving enough plant food, or if it needs some other sort of plant food to make the flowers form properly again.  I'm still hoping for advice from any one who might read this out there in the blogosphere.

But I want to talk about another of my cool plants today!

Here is a photo of my Alligator Aloe...

The plant in front is Alligator Aloe
I absolutely LOVE this plant for some reason.  It's not your typical "Burn Plant" aloe vera, but you can see that it's related.  I love the jagged spikes across the edges of the leaves, and I love the little pups that it puts out.  I'm not sure, but I get the feeling that that pups are considered the tail of the plant and the big Aloe floret is considered the head of the alligator.  The pups are strange in that they don't seem to form the rosette type aloe plant that this one has.  This one has had three pups, but I moved one into another pot.  I have that one growing in a different part of the garden by itself and it's just kind of sitting there...not growing, not dying, and NOT putting out the neat floret part that I love about Aloe. I've looked for this plant online and when if I find it online it always appears to be a much darker green color with lighter green flecks throughout the plant rather than the grey/green coloring that this one is showing.  I like the ones on the internet much better than mine, even though mine does seem to be quite healthy.  I'm going to do some research into this and see what I can find out about it.  Always interested to hear others experiences about plants they see here on my blog too, so if you have one of these and can share your knowledge, please do!

Tomorrow I'm going to change the format of how I do this.  I'm going to try to concentrate on a project a day rather than the million little things that crop up on a day to day basis.  I'm going to try to do step by step What I'm doing type stuff.  If you have any questions or requests, please make them via comments.  Once I get a groove going and find a real direction for this, then it's going to become fun!

Sunday, September 23, 2012

Some photos (GWBoP) and some other things...

Good Evening folks...

It's Sunday, and that means that my posting today is going to come in the evening.  Sunday's are really busy for me, what with Church in the morning, and lunch with the folks in the afternoons.  Of course when that's done and I'm finally home it becomes nap time!  Woot!

I did take some time out this evening to take a few photos though and I figured that I'd get them posted right away.  This first photo is of my Giant White Bird of Paradise plant, which was gifted to me day before yesterday.  I figured that you could all get an idea of what I'm starting with and we'd watch it grow and change on a periodical basis, whenever something new happens with it.

Giant White Bird of Paradise Plant

This is in the North part of the backyard, and as you can see it's already about six feet tall.  I'm so very excited to see where it will go.  Sorry about the size of the picture, as I don't have any photo editing software on this desktop unit, and my laptop is currently down for the count.  When I get some software, I'll be making all of these a little easier to view when you click them.

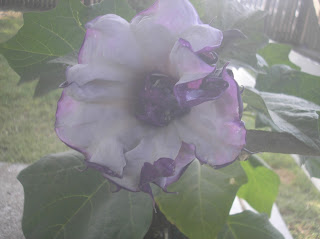
Today I'd like to talk about Datura Metel (Double Black Currant Swirl) plants.  I know that I've explained that I have about 25 of these plants due to a money-making experiment gone bad back in April.  What I never mentioned was that this past August I had a great Horned Worm come in and completely strip the plant of all foliage.  After about three weeks and a LOT of TLC, the plant made an almost miraculous comeback.  A great deal of the foliage is back and I'm even starting to get flowers again...

New Bloom on Mother Datura plant
I'm very excited about this.  It's not completely opened up, but I expect it will this evening.  Datura tend to bloom during the evening and offer up such an incredibly sweet fragrance that it's not really describable.  I'm hoping that it will have a lot of the original purple in it, as the last time I had a problem with this plant and it was sick I lost nearly all of the coloring in the flower...like this...

First flower after June sickness
Hardly ANY of the purple was here...just around the very fringes of the flower.  I have to admit though that it's giving me a new appreciation for the white varieties of the plant though!

Good News!  Two of the baby plants are FINALLY throwing off their first blossoms as well!  I'm concerned about these though as well because they aren't showing the purple either that the flowers above show.  I hope that it's not a gene that was bred out of the flower, because if it is these are going to be very difficult to get rid of when it comes time to sell them off!  Here they are...

first flower from baby datura 1

First flower from Baby Datura 2

Two separate plants that I've grown from seed are finally giving me flowers!  I'm so excited!  You can see that there aren't the colors that the purple one above has though.  I sure hope that it grows into the same kind of flower.

Anyway, that's about it for now.  Tomorrow I'm going to show a problem with a plant I'm having, and hopefully someone out there will offer up a solution to what's happening with it.  Take care for tonight!

Thursday, September 20, 2012

New Addition! Giant White Bird of Paradise!

Today I received a MOST generous gift to add to my garden...a Giant White Bird of Paradise Plant!!


I'm hoping to have a better photo than this soon, but so far it's all I have.  I'll attempt to take a photo of the actual plant, but it's going to be boring...no flowers, one of the leaves is burned, and all the leaves are more or less curled up.  It IS producing new leaves though, which gives me a LOT of hope for the plant.

This plants official Name is Strelitzia Nicolai, and it is a tropical plant that can grow up to 20ft high if planted in the ground.  Right now I don't think I am going to be doing that with it.  The consensus on this plant is that it doesn't bloom until it is at least 3-5 years of age, and I think this one is a little young yet.  If I keep it in it's original one gallon container though, it may force blooming because the space it has to live is too small.

That's an interesting trick that I've learned over time that works with a lot of different types and varieties of plants.  You don't necessarily want to keep all of your plants in pots where they have a lot of room to grow.  If you keep them in smaller pots, you can trick them into thinking that they are going to die because of lack of space, thus forcing them to try to reproduce before they normally would do so.  Kinda sneaky--eh?  Still, you really will want to transplant them eventually into something that they will be more comfortable in.  Just wait until they are done with their flowering cycle before you transplant them.  UNLESS, of course, they are already actively dying--showing many dead or discolored leaves, etc.

Well, it's going to be fun having this one around.  I've been wanting one for a number of months now, so this came as a huge surprise!  I'll keep you posted on how this goes.  I think it will be going in the Front Yard North for the time being, as that has nice, filtered sunlight for it.

Some changes to my original post

Hi folks,

Today's post is going to be a bit strange.  I made some mistakes on my original post and didn't include all the plants that I have growing everywhere, so I'm going to add a few today:

Backyard South:

2 Containers of Sempervivium Arachnidium (spelling?) aka Cobweb plant

Backyard North:

1 container of Dragon Tree regular
1 Container of Variegated Dracaena  (Dragon Tree)
1 Container Coreopsis
1 Container Pride of Barbados (2 in the ground in South Backyard)
1 Container Pink Hawthorne--will be pretty next year.  Looks beaten to death from hail.


Indoors Rooting:

1 Orange Honeysuckle
1 Hummingbird Bush
1 Blue Plumbago
1 Moth Orchid
2 African Violet

Okay, now that that is done, I want to talk about Datura...I'd like to pick anyone's brain who has grown Datura or any form of Brugmansia before.


Last April (I know, kinda late)  I planted 76 Datura Metel Black Currant Swirls seeds.  It took them forever to sprout, but I wound up with about 26 actual plants out of the deal which I figured I would attempt to sell through a local grower who only received stock from other local growers.  I figured that might be a cool way of making a bit of extra cash since I have virtually NO CASH free right now beyond what the Govt gives me to pay my bills with.  Out of those 26, I have approximately THREE now that I would feel comfortable selling.  To me, those sound like TERRIBLE results.  I have the majority of them now growing in gallon sized pots, but a few I'm still growing in much smaller pots as the plants still only have about 4 leaves on them.  I guess my question is this...When do I just give up on them and pitch them out?  If the answer is NO!  Don't do that! Then I really need to know what to do about them to make them grow.  I only have two months left in the season for any growth before I need to cut them back to winter them.  I don't suspect that they will make it past this wintering.

I am having a garage sale here in the next few weeks, and I'm going to go ahead and put these out for sale anyway.  I was thinking I'd sell the better ones for higher prices and try to get two to three bucks out of the smaller ones, but I'd almost feel guilty about it.  For two or three bucks, if you bought a plant that didn't grow for a while, would you be really upset?  Just a quick poll to find out..

I'll also be selling some white Spider Lilies.  I have no photo's of those, but they haven't bloomed in YEARS.  They are growing in great clumps out in the front  yard, intensely overcrowded.  Am I wrong to assume that if I get them spread out and into new locations that they will start to perform?  Anyone got any tips on those?

Guess that's it for today.  It won't always be questions.  I'm hoping to give some answers too here along the way.

Have a great day in YOUR garden!


Tuesday, September 18, 2012

Hi Everyone, and welcome to my new Backyard Garden Blog!!  I've never kept a garden blog before.  Actually, I've not had a lot of luck keeping ANY real blog in the past, so here goes nothing...

I'll try to write in this everyday what sorts of things I'm trying to do in the yards around my Corpus Christi apartment...a very small two bedroom in perhaps the absolute WORST part of Corpus Christi, TX.

Blondmyk's Backyard consists of three area's.  I have two areas in the Front of my apartment (I know...I know...but I had to name the blog something!) and two areas of similar size in the back.  I'm negotiating with the landlord and the apt manager the two other areas on the sides of the buildings, but right now I'm not holding my breath.

The Front yard is separated into two area's...the shady area to the south, and the partly shady area on the North side of the apartment.  The entire front yard is planted with very old Chinaberry trees, perhaps the trashiest tree on the planet!

The backyard is separated into two areas also...the Far South Area (just beyond a big old juniper of some sort) which is full of sun all day long, and then North of the Juniper, which is partly sunny to full sun the further North you go up the yard.  This final area here can get 8+ hours of sun per day, which here in Texas is requiring some VERY hardy plants to tolerate the heat in these spots.  Now...here's a breakdown of what I have in each area SO FAR...

Front South:

HUGE Saddle Leaf Philodendron
Approx 30 White Spider Lilies, either too compact to bloom, or not getting enough light.

Front North:

Container:  Raspberry Bush
Container:  Mini Yellow Rose coupled with a large pink Knockout Rose
Container:  White/Green Calladium with an unknown donation plant that seems as it could be Kolanchoe.
Container:  Secondary Container of Kolanchoe made of cuttings from the original donated plants.

Backyard Far South:

2--Pride of Barbado's--Yellow.  Planted in ground
2--White Spider Lilies--Planted in ground
2--Arachnium "Hen's and Chicks" type succulent in pots
1--Lavender and Pink Saucer Hibiscus in a container
1--Prickly Pear Cactus--in ground--grown from cutting
1--Potted Alligator Plant pup
1--Potted Old Man Cactus
1--Container with Golden Aloe, and two other unnamed Succulents.

Backyard North:

2--Blue Plumbago--in Ground
2--Anemones--in Ground
2--Easter (Bermuda) Lilies--in Ground
1--Pink Texas Sage--in Ground
1--Angel Wing Jasmine--in Container
1--Desert Rose--In Container
1--Red Shrub Hibiscus--in Container
1--Evergreen Wisteria--in Container
4--Pink Spider Lilies--in ground  varying light conditions.
4 containers of Red Canna Lilies which just keep going and going...
1--hanging Burro-tail Cactus (Sedum)
25--(give or take) Datura Metel Black Currant Swirl Plants (Devil's Trumpet)
1--container of snapdragons, Mini Red Roses, and Yellow Glads
1--potted Alligator Plant
4--pots of "Mother of Thousands" (official name not known)
2--Potted Plumeria--color undetermined


The goal for this blog is to share with you the things that happen in my yard with my plants, and what I do to/for them to cure them, kill them, or whatever happens.  Please folks, help me out where you have knowledge, and correct me if I'm about to  make a mistake.  I'll post photos whenever I can to help you visualize.